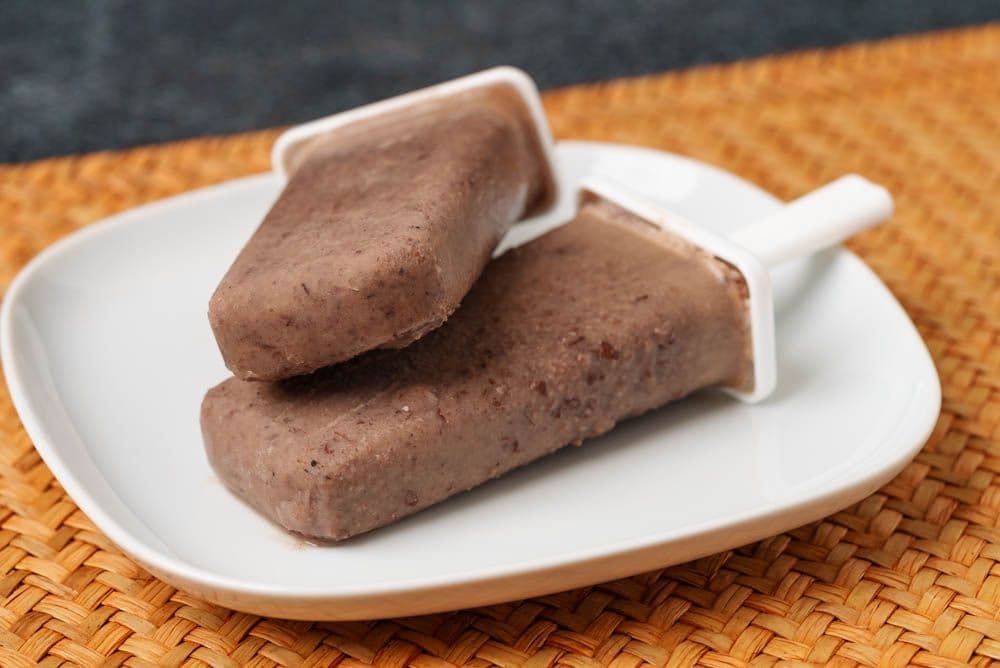
The Red Bean Popsicles My Dad's Made 100,000 Times

Why this recipe

Most red bean popsicles recipes online are tested only a handful of times. My dad used to make this dish multiple times a day, every day, for 60+ years and can make this in his sleep.
I know you'll love it as much as our community does! This recipe has over 109.3K views, 3K likes on YouTube.
This is a special, special recipe that I'm excited to share, especially for Mother's Day! Each bite I take of our homemade Red Bean Popsicles reminds me of my childhood summers, days of playing and swimming until complete, utter, and happy exhaustion.
My mom would make these for my sister and me to fuel us up after a long summer day. Her love always came through in these amazing homemade popsicles.
I'm excited to make these our own kids, and we can't wait for your families to make these treats into your own summer traditions, too.
Ingredients

Instructions
Prepare red beans
Measure out the red beans (4 oz). Take a quick moment to scan through the beans and pick out any broken beans.
Wash the beans three times, draining the water and using fresh water each time. The repeated washing ensures that you’re really rinsing dust and debris off the dried beans.
Add cold water to the bowl of washed beans. Make sure the beans are fully submerged.
Soak for 6-8 hours or overnight at room temperature.
Cook the beans
You’ll know the beans are ready when they’ve expanded in size and lightened in color. Give them a rinse, drain the water, then add the beans to a clean pot.
Add water (16 oz). You can start with cold water or, to save time, use already boiling water.
Bring to a boil on high heat with the pot lid on.
Once the water’s boiling, lower the heat until it’s barely simmering, and give it a quick stir.
Simmer for 1 hour with the lid on, making sure it continues to bubble mildly.
After 1 hour, the red beans should have softened. You can test them by taking a bean (careful, it’s hot!) and pinching; if you can squish and see bean innards burst out, it’s ready.
Add sugar (8 oz) and stir it in. Cook until the sugar dissolves, or about 2 minutes.
In a separate bowl, stir together tapioca starch (1.5 tbsp) and water (1.5 tbsp), mixing until the starch has dissolved. This slurry will thicken the soup and help create a creamier texture when freezing.
Turn off the heat. Add the tapioca starch slurry and stir until the red bean soup thickens.
Set the pot aside to cool, which may take about 1 hour.
Blend with other ingredients
When the red bean soup has cooled enough to handle safely, add milk (8 oz).
Shake the can of coconut milk to ensure that the cream and milk inside is well-combined. Then, add the coconut milk (6 oz) to the soup.
Pour the soup into your blender. Blend at medium speed for 30 seconds, or until it’s at your desired level of smoothness. If you want a chunkier texture, you can blend for a shorter time, or reserve some unblended beans to mix back in after blending.
Pour into molds & freeze
Carefully fill up the popsicle molds with the blended soup. Pop on the lid. If the sticks are attached to the lid, perfect; if they’re not, and you have to add the sticks individually, then wait until the popsicles are mostly set to insert them.
Place the popsicles into the freezer. Make sure they’re on a level, stable surface that won’t get bumped when you close the door. Let them freeze for at least 6 hours until they’re completely set.
Remove popsicles from molds & taste test
Prepare a bowl of boiling water. Dip each mold into the hot water and hold until you can hear or feel the popsicle release from the mold. Enjoy!
Pairs well with
View all →Made with love ❤️

We started Made With Lau to celebrate Cantonese culture and honor the legacy of our wonderful parents, Jenny and Chung Sun Lau.
Our hope is that these recipes and stories help you spread the joy, love, and nostalgia that I felt growing up.